OUGD504
DESIGN FOR PRINT
LASER CUT WORKSHOP
As part of my ongoing research in to design for print I decided to attend a laser cut workshop. Not only will it help me gain primary research of the process for my print pack but it is also a process that I would like to learn more about for future brief.
INFORMATION PACK PROVIDED:
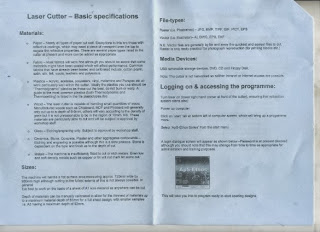

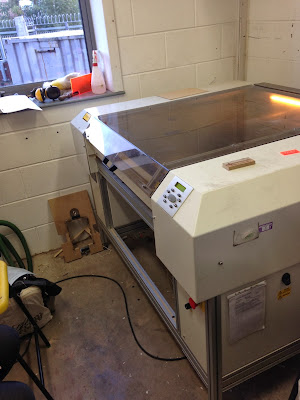
This is the machine we used the laser its self is in the side of the machine its really large to move around so mirrors make it the laser bounce. & through the laser it focus.
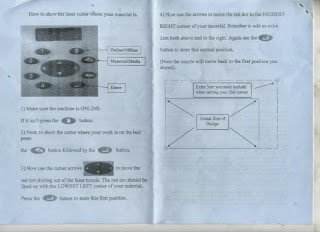
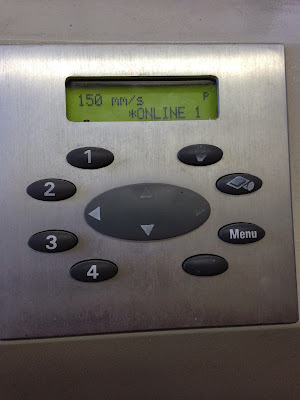
Here are the buttons used to operate the machine -
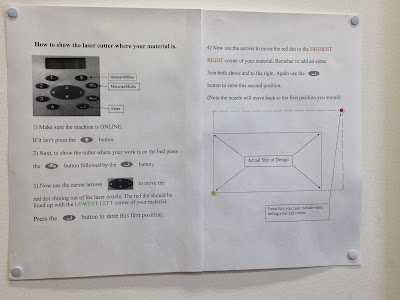
This was a step by step manual for the buttons on the wall that is left there for referral because some of the buttons had rubbed off so new people are unaware of them.
You use the ONLINE button which is top right , then the one underneath it which is to show the laser cutter where your work is . Then you miss the menu button and press the bottom one which is the enter button.
We were told a lot about acrylic and also reflective services :
DESIGN FOR PRINT
LASER CUT WORKSHOP
As part of my ongoing research in to design for print I decided to attend a laser cut workshop. Not only will it help me gain primary research of the process for my print pack but it is also a process that I would like to learn more about for future brief.
INFORMATION PACK PROVIDED:


This is the machine we used the laser its self is in the side of the machine its really large to move around so mirrors make it the laser bounce. & through the laser it focus.

Here are the buttons used to operate the machine -

This was a step by step manual for the buttons on the wall that is left there for referral because some of the buttons had rubbed off so new people are unaware of them.
You use the ONLINE button which is top right , then the one underneath it which is to show the laser cutter where your work is . Then you miss the menu button and press the bottom one which is the enter button.

We were told a lot about acrylic and also reflective services :
Acrylic - dangerous fumes , we were advised to have a break and only laser cut on acrylic for up to 15 minutes at a time.
Grey Lino is okay to cut on to but you shouldn't use brown Lino ever because the fumes are even more dangerous then from acrylic.
The only reflective material aloud to be used is mirrored acrylic but you would put it in upside down to avoid the reflection.

Here we looked at some examples of different types of laser cutting on different materials and stocks.
We were told about cutting on wood and because it burns we would get a burnt mark around the top.

We looked at some different types of acrylic and some wood & also paper that had been laser cut.

Next we looked at the four different types of laser cut:
Cut through
Kiss cut - lighter than engrave on the surface rather than depth
Raster - Fills in rather than outside

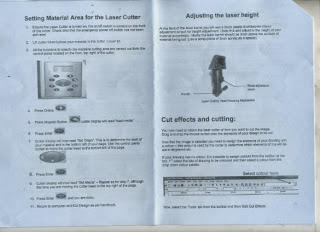
We were about to do a test on the machine so we used a piece of acrylic to be cut . We put a block of wood underneath the laser which was12mm this is to make the perfect amount of space between the laser and the material . You repeat this process for every material.
We next used the arrow tools next to the online button on the machine and move the laser in the corner of the acrylic not too close to the edge. Lowest left hand corner first then top right.
To make this position apply we need to store it by using the button on the machine. once we have moved the arrows to reach the top right corner and pressed enter it will jump back to the beginning letting you know its stored.

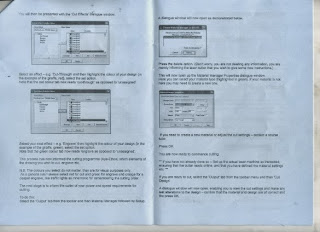
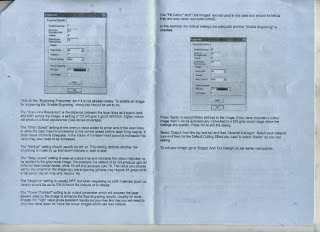
The next step of the induction was the test the teacher did on the pc in front of us he showed us the step by steps.
The programme used for laser cutting is called APS - Ethos
We first selected the drop down menu which gave the options of the different colours
Green - engrave
Voilet - kiss cut
Red - cut through
Turquoise - no cut
We selected each section of the word test and the outer shapes and used a colour for each eg. green for one of the outlines so that would engrave on the machine.

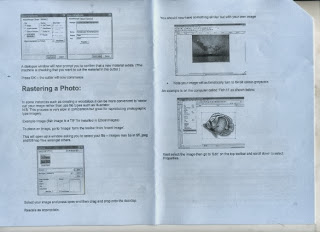
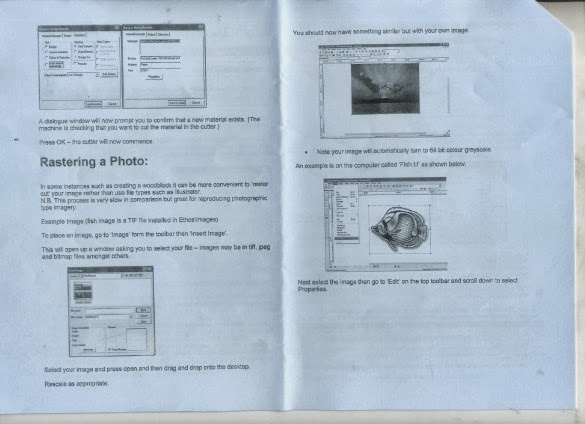
We next rasters the inside of the word 'test' by clicking on a icon on the top bar which has a gold star on it.
Object properties
engraving properties
enable engraving ( tick box)
Apply and ok! always click apply or your changes wont be saved.
You need to make sure you always check these options because the machine needs to know what material is going through it .
Use output
Material manager setup
Material - long list (pick the appropriate material )
Select acrylic click OK
Cut design
Just double check your material manager. Always double check , with small design wont be hot.

You could see the small red light moving fast burning the acrylic i was surprised how fast it moved. This was properly because of the size of the design.

You should always hover the dust off the acrylic because of the dangerous fumes we don't want to breathe them in.
We next did our own test piece using the machine. We each had a go going through the initial step by steps.
We used wood for ours instead of acrylic because there was a few of us in a small room we didn't want the air to be full of dangerous fumes.

Once the piece had finished it looks like this , but it is actually completely cut out so it falls out like a jigsaw piece.

You just lift the remaining wood and your design is there. Like this piece sometimes it leaves a burning finish because the laser burns the wood.

Illustrator file
With an illustrator file it wont have cutter sheets.
Open a new document and copy and paste your design over
Make sure you select laser effects.

JPEG
Insert image button - place
click on the shape
properties - tick top box
scan line resolution
reduce it 0.1
Grey levels
When it trys to colour dark in your get tone depending on detail
check negative
hit apply
raster (little box with star)
No comments:
Post a Comment